
Publishing machine learning models may be hard, especially when considering the best environment to host your models. AWS and GCP provides strong cloud platforms, but the preparation process varies greatly. Recently, we wrote Evidence of MLFlow’s publication on the Google Cloud platformAnd now we will share a comprehensive step -by -step guide when preparing MNFlow on AWS using Terraform. From the preparation of VPC to the creation of a database and the ECS service and the preparation of safety groups, we will walk during the entire process normally, with each section allocating to a specific component.
Give a reading to understand how to create a strong, safe, and developmental MNFOW load on AWS, all taking advantage of the power and comfort of the infrastructure as a symbol through Terraform.
storehouse
For easy access and guidance, we have prepared a file storehouse It contains all the basic materials related to this guide. If you have any questions or have problems, you can find answers there.
AWS Cli
- Install AWS Cli: Follow this Instructions when installing the AWS orders interface (Cli).
- Create your access key: Create a user key to manage your Terraform resources After these instructions.
- Log in with AWS configurationUse the AWS configuration order to log in.
Terraform preparation
Terraform version used here: V1.5.0
- Install Terraform: Follow Official documents To install Terraform on your system.
- Automatic documents: For automatic documents, you can install Terraform-Docs. He follows This is the documents.
Create a S3 bucket to store Terraform
First, you need to store the Terraform condition in a cloud storage service like Amazon S3, instead of locally. For more details about Terraform State, you can read This is the documents.
Follow these steps to create a S3 bucket to store Terraform:
- Go to Amazon S3 and click “Create a bucket”.
- Choose a name and area for your bucket.
You can leave the rest of the settings in their default values.
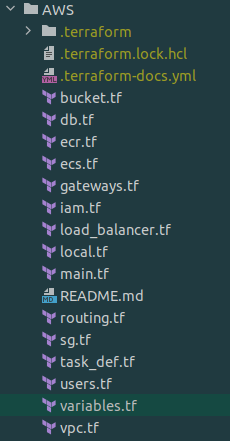
Project structure
Upon completion of the instructions, your TerraForm project must have the following structure:
After each section, use Terraform Plan To inspect the resources that will be added, and Terraform app To apply these changes.
Variables
construction Variables The file and start identifying the basic variables of the project.
variable "env" {
  default     = "test"
  description = "Name of the environment"
}

variable "app_name" {
  default = "mlflow-terraform"
}

variable "region" {
  default = "eu-central-1"
}

variable "ecs_service_name" {
  default = "mlflow-test"
}

variable "ecs_task_name" {
  default = "mlflow-test"
}
After that, we will create variables for our network. You can use different sub -network ranges if you prefer it. Change values to Your_VPN, zone_a, zone_b and region To match your project.
variable "cidr" {
  default     = "10.0.0.0/25"
  description = "Cidr block of vpc"
}

variable "private_cidr_a" {
  default = "10.0.0.0/28"
}

variable "private_cidr_b" {
  default = "10.0.0.16/28"
}

variable "db_cidr_a" {
  default = "10.0.0.32/28"
}

variable "db_cidr_b" {
  default = "10.0.0.48/28"
}

variable "public_cidr_a" {
  default = "10.0.0.96/28"
}

variable "public_cidr_b" {
  default = "10.0.0.112/28"
}

variable "your_vpn" {
  default = "0.0.0.0/0"
}

variable "zone_a" {
  default = "eu-central-1a"
}

variable "zone_b" {
  default = "eu-central-1b"
}

variable "internet_cidr" {
  default     = "0.0.0.0/0"
  description = "Cidr block for the internet"
}
construction Local.tf The file that will carry our marks:
 locals {
  # Common tags to be assigned to all resources
  tags = {
    Name        = "mlflow-terraform"
    Environment = var.env
  }
}
The main file
in Main.tfWe will enter our basic composition; The version should be the latest available.
terraform {
  required_providers {
    aws = {
      source  = "hashicorp/aws"
      version = "~> 5.4.0"
    }
  }
  backend "s3" {
    bucket = "your bucket name"
    key    = "test/terraform.tfstate"
    region = "eu-central-1"
  }
required_version = ">= 1.5"
}

provider "aws" {
  region = var.region

  default_tags {
    tags = local.tags
  }
}
After creating the main file, you must run Terraform Init To install the required service providers and prepare the condition in the bulldozer. You should receive confirmation that service providers have been successfully installed.
S3 bucket
In the new file bucketWe will create a bucket to store our artifacts from MLFlow. URI should be saved for a bucket, where we will use it later.
resource "aws_s3_bucket" "mlflow-bucket" {
  bucket = "mlflow-bucket-${var.app_name}-${var.env}"

}

resource "aws_ssm_parameter" "mlflow-bucket_url" {
  name  = "/${var.app_name}/${var.env}/ARTIFACT_URL"
  type  = "SecureString"
  value = "s3://${aws_s3_bucket.mlflow-bucket.bucket}"

  tags = local.tags
}
user
In the file User.tfWe will create a user that will be used by MLFlow to reach the bulldozers.
data "aws_iam_policy" "bucket_access" {
  name = "AmazonS3FullAccess"
}

resource "aws_iam_user" "mlflow_s3" {
  name = "mlflow-access-s3"
  permissions_boundary = data.aws_iam_policy.bucket_access.arn

    tags = local.tags
}
resource "aws_iam_user_policy_attachment" "attach-policy" {
  user       = aws_iam_user.mlflow_s3.name
  policy_arn = data.aws_iam_policy.bucket_access.arn
}
After that, we need to create a key for the user in order to be able to ratify. The key ID and key ID will be placed in ParameterAnd we will need them later.
resource "aws_iam_access_key" "mlflow_s3" {
  user = aws_iam_user.mlflow_s3.name

}

resource "aws_ssm_parameter" "mlflow_key_id" {
  name  = "/${var.app_name}/${var.env}/AWS_ACCESS_KEY_ID"
  type  = "SecureString"
  value = aws_iam_access_key.mlflow_s3.id

  tags = local.tags
}

resource "aws_ssm_parameter" "mlflow_key_secret" {
  name  = "/${var.app_name}/${var.env}/AWS_SECRET_ACCESS_KEY"
  type  = "SecureString"
  value = aws_iam_access_key.mlflow_s3.secret

    tags = local.tags
}
ECR
ECR will carry a Docker image with MLFlow. You must create a new file called Ecr.tf
resource "aws_ecr_repository" "mlflow_ecr" {
  name                 = "${var.app_name}-${var.env}-image"
  image_tag_mutability = "MUTABLE"

  image_scanning_configuration {
    scan_on_push = true
  }
  encryption_configuration {
    encryption_type = "AES256"
  }
  tags = local.tags
}
After creating ECR, you should pay your Docker image. here Instructions on how to do this. The image must be paid with the brand Delay.
network
Create a new file named Vpc.tf This is where we will determine networks related to networks.
First, we will create a virtual special cloud (VPC). All subsequent resources that we create will be associated with this VPC.
resource "aws_vpc" "main" {
  cidr_block           = var.cidr
  tags                 = local.tags
  enable_dns_support   = true
  enable_dns_hostnames = true
}
Here we are creating a special sub -network that will be used in ECS, where we want to ensure that high -security ECS will have a special address only. These sub -networks will be connected to Nat Gateway. It should be located in two separate areas within the area you choose.
resource "aws_subnet" "private_subnet_a" {
  vpc_id            = aws_vpc.main.id
  cidr_block        = var.private_cidr_a
  availability_zone = var.zone_a
  tags              = local.tags
}

resource "aws_subnet" "private_subnet_b" {
  vpc_id            = aws_vpc.main.id
  cidr_block        = var.private_cidr_b
  availability_zone = var.zone_b
  tags              = local.tags
}
After that, we will create public sub -networks (the IP ranges that we use here are in particular, but because of the fact that it will be connected to the internet gate that I call the public where you can access the general IPS from them) that will be used by Load Balancer, it will be connected to the Internet gate.
resource "aws_subnet" "public_subnet_a" {
  vpc_id            = aws_vpc.main.id
  cidr_block        = var.public_cidr_a
  availability_zone = var.zone_a
  tags              = local.tags
}

resource "aws_subnet" "public_subnet_b" {
  vpc_id            = aws_vpc.main.id
  cidr_block        = var.public_cidr_b
  availability_zone = var.zone_b
  tags              = local.tags
}
We also create two sub -networks in two separate areas of our database. Since the formation of the database accepts a sub -network group instead of individual sub -networks, we will also need to create a sub -network group as well.
resource "aws_subnet" "db_subnet_a" {
  vpc_id            = aws_vpc.main.id
  cidr_block        = var.db_cidr_a
  availability_zone = "eu-central-1a"
  tags              = local.tags
}

resource "aws_subnet" "db_subnet_b" {
  vpc_id            = aws_vpc.main.id
  cidr_block        = var.db_cidr_b
  availability_zone = "eu-central-1b"
  tags              = local.tags
}

resource "aws_db_subnet_group" "db_subnet_group" {
  name       = "${var.app_name}-${var.env}-db-subnet-group"
  subnet_ids = [aws_subnet.db_subnet_a.id, aws_subnet.db_subnet_b.id]
  tags       = local.tags
}
Gates
Since the network is prepared, the next step is to add gates to ensure a suitable traffic from the Internet and to the Internet. Create Gateways.tf file.
First, we will prepare the basic internet portal:
resource "aws_internet_gateway" "main" {
  vpc_id = aws_vpc.main.id
  tags   = local.tags
}
Next, we will prepare Nat Gateways; We use AWS_EIP To book a general IP address dedicated to our NAT Gate, where the portal needs this address to communicate with other general titles.
resource "aws_eip" "nat_ip_a" {
  domain   = "vpc"
  tags = local.tags
}

resource "aws_eip" "nat_ip_b" {
  domain   = "vpc"
  tags = local.tags
}

resource "aws_nat_gateway" "mlflow_nat_a" {
  allocation_id = aws_eip.nat_ip_a.id
  subnet_id     = aws_subnet.public_subnet_a.id

  depends_on = [aws_internet_gateway.main]

  tags = local.tags
}

resource "aws_nat_gateway" "mlflow_nat_b" {
  allocation_id = aws_eip.nat_ip_b.id
  subnet_id     = aws_subnet.public_subnet_b.id

  depends_on = [aws_internet_gateway.main]

  tags = local.tags
}
Guidance
The last net related to the network we have to do is guidance. Create Guidance file.
First, we create a path that will be used by the database and loading balance:
resource "aws_route_table" "public" {
  vpc_id = aws_vpc.main.id

  route {
    cidr_block = var.internet_cidr
    gateway_id = aws_internet_gateway.main.id
  }

  tags = local.tags
}
Next, we will create a pathway schedules that allow us to direct traffic from NAT gates to the Internet:
resource "aws_route_table" "private_a" {
  vpc_id = aws_vpc.main.id

  route {
    cidr_block = var.internet_cidr
    gateway_id = aws_nat_gateway.mlflow_nat_a.id
  }

  tags = local.tags
}

resource "aws_route_table" "private_b" {
  vpc_id = aws_vpc.main.id

  route {
    cidr_block = var.internet_cidr
    gateway_id = aws_nat_gateway.mlflow_nat_b.id
  }

  tags = local.tags
}
The last step is to add track schedule associations:
resource "aws_route_table_association" "private_subnet_association_a" {
  route_table_id = aws_route_table.private_a.id
  subnet_id      = aws_subnet.private_subnet_a.id
}

resource "aws_route_table_association" "private_subnet_association_b" {
  route_table_id = aws_route_table.private_b.id
  subnet_id      = aws_subnet.private_subnet_b.id
}


resource "aws_route_table_association" "db_subnet_association_a" {
  route_table_id = aws_route_table.public.id
  subnet_id      = aws_subnet.db_subnet_a.id
}

resource "aws_route_table_association" "db_subnet_association_b" {
  route_table_id = aws_route_table.public.id
  subnet_id      = aws_subnet.db_subnet_b.id
}


resource "aws_route_table_association" "public_subnet_association_a" {
  route_table_id = aws_route_table.public.id
  subnet_id      = aws_subnet.public_subnet_a.id
}

resource "aws_route_table_association" "public_subnet_association_b" {
  route_table_id = aws_route_table.public.id
  subnet_id      = aws_subnet.public_subnet_b.id
}
Security groups
To ensure the right traffic flow within our network, we will also need to determine the appropriate safety groups. Create a new file called SG.TF.
First, we will create a seat group that allows the connection from VPN to RDS (database service).
VPN -> RDS
resource "aws_security_group" "allow_ingress_from_vpn" {
  name        = "allow_ingress_from_vpn"
  description = "Allow inbound traffic from VPN"
  vpc_id      = aws_vpc.main.id

  tags = local.tags
}

resource "aws_security_group_rule" "db_ingress" {
  type              = "ingress"
  description       = "TLS from VPN"
  from_port         = 5432
  to_port           = 5432
  protocol          = "tcp"
  cidr_blocks       = [var.your_vpn]
  security_group_id = aws_security_group.allow_ingress_from_vpn.id
}
Next, we will create a special safety set for ECS (flexible container service). This security group will determine the communication rules for the incoming traffic and issued related to ECS tasks and services, while ensuring its ability to communicate safely with other resources within our infrastructure.
ECS -> RDS
resource "aws_security_group" "ecs_sg" {
  name        = "${var.env}-${var.app_name}-ecs-sg"
  description = "Contains all the rules for ECS"
  vpc_id      = aws_vpc.main.id

  tags = local.tags
}
This base will allow traffic from our ECS service to the Internet. This ensures that the containers that are operating in the ECS service can access external resources or application programming facades ECS will not have a general IP address).
ECS -> Internet
resource "aws_security_group_rule" "ecs_egress_all" {
  description       = "ECS outbound"
  type              = "egress"
  from_port         = 0
  to_port           = 65535
  protocol          = "tcp"
  cidr_blocks       = [var.internet_cidr]
  security_group_id = aws_security_group.ecs_sg.id
}
The second rule will allow the traffic from the loading balance to the ECS service. This is very important to distribute traffic on the Internet through multiple containers in the ECS service.
ECS <- LB
resource "aws_security_group_rule" "ecs_ingress" {
  description              = "ECS outbound"
  type                     = "ingress"
  from_port                = 80
  to_port                  = 8080
  protocol                 = "tcp"
  security_group_id        = aws_security_group.ecs_sg.id
  source_security_group_id = aws_security_group.lb_sg.id
}
This safety group will be formed to allow traffic from ECS to the RDS database. This enables your ECS containers to communicate with the database in RDS.
RDS <- ECS
resource "aws_security_group" "rds_sg" {
  name        = "${var.env}-${var.app_name}-rds-sg"
  description = "Allow inbound from ECS"
  vpc_id      = aws_vpc.main.id

  tags = local.tags
}

resource "aws_security_group_rule" "rds_ingress" {
  description              = "ECS inbound"
  type                     = "ingress"
  from_port                = 5432
  to_port                  = 5432
  protocol                 = "tcp"
  security_group_id        = aws_security_group.rds_sg.id
  source_security_group_id = aws_security_group.ecs_sg.id
}
The final safety group that we will create for the load balance will be set. This configuration ensures that the load balance can properly distribute the traffic contained through multiple targets, such as ECS counterparts, in a safe way.
resource "aws_security_group" "lb_sg" {
  name   = "lb_security_group"
  vpc_id = aws_vpc.main.id

  tags = local.tags
}
The first rule will restrict the traffic incoming for only to create our VPN. If you do not use VPN or if you want the ML flow available to the public, you can either skip this rule or use Wanternet_cidr instead of Var.your_vpn. This configuration ensures that only the authorized traffic from VPN can reach the loading balance.
LB <- VPN
resource "aws_security_group_rule" "ingress_lb_ports" {
  type              = "ingress"
  from_port         = 80
  to_port           = 80
  protocol          = "TCP"
  cidr_blocks       = [var.your_vpn]
  security_group_id = aws_security_group.lb_sg.id
}
The second rule will manage the traffic from the loading balance to the ECS service. This composition ensures smooth communication between the loading balance and the ECS.
LB -> IP
resource "aws_security_group_rule" "egress_lb_ecs" {
  type              = "egress"
  from_port         = 0
  to_port           = 0
  protocol          = "-1"
  cidr_blocks       = [var.internet_cidr]
  security_group_id = aws_security_group.lb_sg.id
}
Database
The database will store all the MLFlow records that we create. First, we will create an unparalleled database and then enter all the necessary information in the AWS store for the teacher to use in defining the task. Create a new file for this purpose and call it Db.tf.
- We put public Feature to “TRUE“But we will restrict traffic using the safety groups that we have previously created.
- You can adjust Suitable _class As needed for more arithmetic energy.
- Knowledgeable It will serve as the name of the church, while db_name The name of the database that is created inside the counterpart will be.
resource "aws_db_instance" "mlflow-db" {
  allocated_storage      = 10
  db_name                = "mlflowdb"
  identifier             = "${var.app_name}-${var.env}-db"
  engine                 = "postgres"
  engine_version         = "15.2"
  instance_class         = "db.t3.micro"
  username               = "mlflow_db_user"
  password               = random_password.db_password.result
  vpc_security_group_ids = [aws_security_group.allow_ingress_from_vpn.id, aws_security_group.rds_sg.id]
  publicly_accessible    = "true"
  db_subnet_group_name   = aws_db_subnet_group.db_subnet_group.name
  skip_final_snapshot    = true
  storage_encrypted      = true

  depends_on = [aws_internet_gateway.main]

  tags = local.tags
}

resource "random_password" "db_password" {
  length           = 16
  special          = true
  override_special = "!#$%&*()-_=+[]{}<>:?"
}

resource "aws_ssm_parameter" "db_password" {
  name  = "/${var.app_name}/${var.env}/DB_PASSWORD"
  type  = "SecureString"
  value = random_password.db_password.result

  tags = local.tags
}

resource "aws_ssm_parameter" "db_url" {
  name  = "/${var.app_name}/${var.env}/DATABASE_URL"
  type  = "SecureString"
  value = "postgresql://${aws_db_instance.mlflow-db.username}:${random_password.db_password.result}@${aws_db_instance.mlflow-db.address}:5432/${aws_db_instance.mlflow-db.db_name}"

  tags = local.tags
}

resource "random_password" "mlflow_password" {
  length           = 16
  special          = true
  override_special = "!#$%&*()-_=+[]{}<>:?"
}

resource "aws_ssm_parameter" "mlflow_password" {
  name  = "/${var.app_name}/${var.env}/MLFLOW_TRACKING_PASSWORD"
  type  = "SecureString"
  value = random_password.mlflow_password.result

  tags = local.tags
}
Download balance
In this section, we will prepare the loading balance with all the items you use. The loading balance is necessary to manage traffic in our ECS service. By creating safety groups, we can reduce the authorized IP range to interact with our download balance, and thus with the ECS service. Create a new file for this composition and call it Load_Balanycer.tf
resource "aws_lb" "mlflow" {
  idle_timeout       = 60
  internal           = false
  ip_address_type    = "ipv4"
  load_balancer_type = "application"
  name               = "mlflow"
  security_groups = [
    aws_security_group.lb_sg.id,
  ]
  subnets = [
    aws_subnet.public_subnet_a.id,
    aws_subnet.public_subnet_b.id,
  ]
  tags = local.tags
}
After that, we will create a targeted group with a healthy examination. The health examination ensures that the ECS service is working. If it is passed, the download balance will direct traffic to the ECS service. In this composition, Matcher = “401” It determines that a health examination will be considered successful if it is /Ping The path returns the case code 401.
You may wonder Why do we use a code 401 instead of 200 traditional 200. The reason is that we cannot receive 200 icons of a situation unless we log in. There are open public relationships to address this future in the future, which you can review here.
resource "aws_lb_target_group" "mlflow" {
  name            = "mlflow"
  port            = 80
  ip_address_type = "ipv4"
  protocol        = "HTTP"
  target_type     = "ip"
  vpc_id          = aws_vpc.main.id

  health_check {
    enabled             = true
    healthy_threshold   = 5
    interval            = 30
    matcher             = "401"
    path                = "/ping"
    port                = "traffic-port"
    protocol            = "HTTP"
    timeout             = 5
    unhealthy_threshold = 2
  }
}
The last step in this process is to create a listener and determine the rules he will use.
resource "aws_alb_listener" "mlflow" {
  load_balancer_arn = aws_lb.mlflow.id
  port              = 80
  protocol          = "HTTP"

  depends_on = [aws_lb.mlflow, aws_lb_target_group.mlflow]

  default_action {
    order            = 1
    target_group_arn = aws_lb_target_group.mlflow.id
    type             = "forward"
  }
}

resource "aws_lb_listener_rule" "mlflow" {
  listener_arn = aws_alb_listener.mlflow.id
  priority     = 1

  action {
    target_group_arn = aws_lb_target_group.mlflow.id
    type             = "forward"
  }
  condition {
    source_ip {
      values = [var.internet_cidr]
    }
  }
}
I am
In this step, we will create a role and a policy that ECS will use.
data "aws_iam_policy" "cloud_watch" {
  name = "AWSOpsWorksCloudWatchLogs"
}

data "aws_iam_policy" "ecs_task_execution" {
  name = "AmazonECSTaskExecutionRolePolicy"
}

resource "aws_iam_role" "ecs_mlflow" {
  name = "ECSMlFlow"

  managed_policy_arns = [
    aws_iam_policy.access_ssm.arn,
    data.aws_iam_policy.cloud_watch.arn,
    data.aws_iam_policy.ecs_task_execution.arn
  ]

  assume_role_policy = jsonencode({
    Version = "2012-10-17"
    Statement = [
      {
        Action = "sts:AssumeRole"
        Effect = "Allow"
        Sid    = ""
        Principal = {
          Service = "ecs-tasks.amazonaws.com"
        }
      },
    ]
  })

  tags = local.tags
}

resource "aws_iam_policy" "access_ssm" {
  name        = "AccessSSM_MlFlow"
  path        = "https://dlabs.ai/"
  description = "Policy for accessing SSM for MlFlow"

  policy = jsonencode({
    Version = "2012-10-17"
    Statement = [
      {
        Action = [
          "ssm:GetParameter",
          "ssm:GetParameters",
          "ssm:GetParametersByPath"
        ]
        Effect   = "Allow"
        Resource = "arn:aws:ssm:*:*:*"
      },
    ]
  })
}
Definition of the task
Now, we will create an important definition for use by ECS. Create a new file named Task_def.tf.
- Container_definitionsThis section allows us to form our container.
- environment: In this section, you can add values that will be available inside the container.
- Secrets: Since we need to pass passwords, this is a safe way to do this. You do not store secrets in the source code, and AWS will withdraw the secrets from the parameter store, making it available for your container.
resource "aws_ecs_task_definition" "mlflow" {
  execution_role_arn = aws_iam_role.ecs_mlflow.arn
  family       = var.ecs_task_name
  memory       = "3072"
  cpu          = "1024"
  network_mode = "awsvpc"
  requires_compatibilities = [
    "FARGATE",
  ]

  container_definitions = jsonencode(
    [
      {
        environment = [
          {
            name  = "DB_PORT"
            value = "5432"
          },
          {
            name  = "MLFLOW_TRACKING_USERNAME"
            value = "mlflow-user"
          },
        ]
        essential = true
        image     = "${aws_ecr_repository.mlflow_ecr.repository_url}:latest"
        logConfiguration = {
          logDriver = "awslogs"
          options = {
            awslogs-create-group  = "true"
            awslogs-group         = "/ecs/${var.ecs_service_name}/${var.ecs_task_name}"
            awslogs-region        = var.region
            awslogs-stream-prefix = "ecs"
          }
        }
        name = var.ecs_task_name
        portMappings = [
          {
            appProtocol   = "http"
            containerPort = 8080
            hostPort      = 8080
            name          = "${var.ecs_task_name}-8080-tcp"
            protocol      = "tcp"
          },
        ]
        secrets = [
          {
            name      = "AWS_ACCESS_KEY_ID"
            valueFrom = "/${var.app_name}/${var.env}/AWS_ACCESS_KEY_ID"
          },
          {
            name      = "AWS_SECRET_ACCESS_KEY"
            valueFrom = "/${var.app_name}/${var.env}/AWS_SECRET_ACCESS_KEY"
          },
          {
            name      = "MLFLOW_TRACKING_PASSWORD"
            valueFrom = "/${var.app_name}/${var.env}/MLFLOW_TRACKING_PASSWORD"
          },
          {
            name      = "ARTIFACT_URL"
            valueFrom = "/${var.app_name}/${var.env}/ARTIFACT_URL"
          },
          {
            name      = "DATABASE_URL"
            valueFrom = "/${var.app_name}/${var.env}/DATABASE_URL"
          },
        ]
      },
    ]
  )

  runtime_platform {
    cpu_architecture        = "X86_64"
    operating_system_family = "LINUX"
  }
  tags = local.tags
}
pool
To create an ECS service, we first need to create an ECS group where the service will be run. When setting up a set via the AWS console, a capacity is created automatically. However, if you are using Terraform, you will need to select the capacity provider as a separate resource. Create a new file named ECS.TF For this purpose.
resource "aws_ecs_cluster" "mlflow_ecs" {
  name = "${var.app_name}-cluster"

  setting {
    name  = "containerInsights"
    value = "enabled"
  }
}

resource "aws_ecs_cluster_capacity_providers" "base" {
  cluster_name = aws_ecs_cluster.mlflow_ecs.name

  capacity_providers = ["FARGATE"]

  default_capacity_provider_strategy {
    weight            = 10
    base              = 1
    capacity_provider = "FARGATE"
  }
}
Ecs
The final component that we will prepare is the ECS service.
- To enable ECS to create a target in the target group, it is necessary to prepare the full loading budget first. For this reason we use He depends Describing.
- To allow the MNFlow access from the Internet, we set the general IP address. However, access to the load balance level is restricted to the IP range that you have identified (recommended using the VPN you face for this).
resource "aws_ecs_service" "mlflow" {
  health_check_grace_period_seconds = 0
  name                              = var.ecs_service_name
  enable_ecs_managed_tags           = true
  propagate_tags                    = "NONE"
  cluster                           = aws_ecs_cluster.mlflow_ecs.id
  task_definition                   = "${aws_ecs_task_definition.mlflow.family}:${aws_ecs_task_definition.mlflow.revision}"
  desired_count                     = 1

  tags = local.tags

  depends_on = [
    aws_lb.mlflow,
    aws_alb_listener.mlflow,
    aws_lb_target_group.mlflow,
    aws_lb_listener_rule.mlflow,
    aws_ecs_task_definition.mlflow
  ]

  deployment_circuit_breaker {
    enable   = true
    rollback = true
  }

  deployment_controller {
    type = "ECS"
  }

  capacity_provider_strategy {
    base              = 1
    capacity_provider = "FARGATE"
    weight            = 10
  }


  load_balancer {
    container_name   = var.ecs_task_name
    container_port   = 8080
    target_group_arn = aws_lb_target_group.mlflow.arn
  }

  network_configuration {
    security_groups = [
      aws_security_group.ecs_sg.id,
      aws_security_group.rds_sg.id,
    ]

    subnets = [
      aws_subnet.private_subnet_a.id,
      aws_subnet.private_subnet_b.id,
    ]
  }
}
conclusion
I hope this guide has gone through every step MNFlow preparation on AWS ECS using Terraform. The implementation of MLFlow in such a structured and mechanical environment not only reduces the flow of your data science, but also makes it more developed and maintenance in the long run.
If you find this guide useful, do not forget to subscribe to our newsletter. We regularly share insightful articles, advice and guidelines on various technical topics that can help you stay in the field. Do not miss – Subscribe today!